Modernise your intranet structure with Hub Sites
In the past, many organisations used a few top-level sites with nested sub-sites underneath as their way to organise their intranet structure and navigation.
Something like this:

As you can see, it looks a little like the file folder structure we all know and loathe. This structure worked for organisations because security, branding and content types were all inherited from the top-level site to the sub-site. For IT admins, it kept things tidy in the back end with only a handful of top-level site collections.
However, it brought about a few problems:
No room for flexibility and change - hard to move sub sites around (e.g. after a re-org)
Hard to manage security. For sub sites that need extra security, such as HR or Finance, inheritance must be broken from the top-site collection. As admins, it’s harder to keep track of security groups and where they apply.
Storage issues. Many subsites in a site collection can result in storage issues which leads to errors and impacts performance.
Confusing navigation. It’s harder for users to navigate a site collection if the hierarchy is deep and information is buried. Many clicks are required to find information.
Since the launch of SharePoint online, Microsoft has been recommending a flat architecture, meaning there should be little to no subsites – each new site should be a top-level site. This means it’s easier to move sites around and manage security. However this also means lots of sites floating around on their own now…
Enter Hubs…
Hub Sites were introduced to help organise these individual sites. Hub Sites group sites together in whichever way makes sense for your organisation without the restrictions of using sub sites. For example:
Grouping department sites under one ‘Company’ hub (Finance, IT, HR etc.)
Or grouping large department sites together, for example a Finance hub that contains Payroll, Reporting and Procurement
Grouping Project sites together
When a site is associated with a hub, it inherits a shared navigation bar along the top as well as inheriting the branding of the hub to give a consistent look and feel to all sites associated with it. For these reasons, sites can only be associated with one hub. However, with the click of a button, you can change which hub it is associated with, which makes it an extremely flexible and a future-proof way to set up your intranet.
So instead of the sub site structure we saw above, hub sites would look something like this instead:
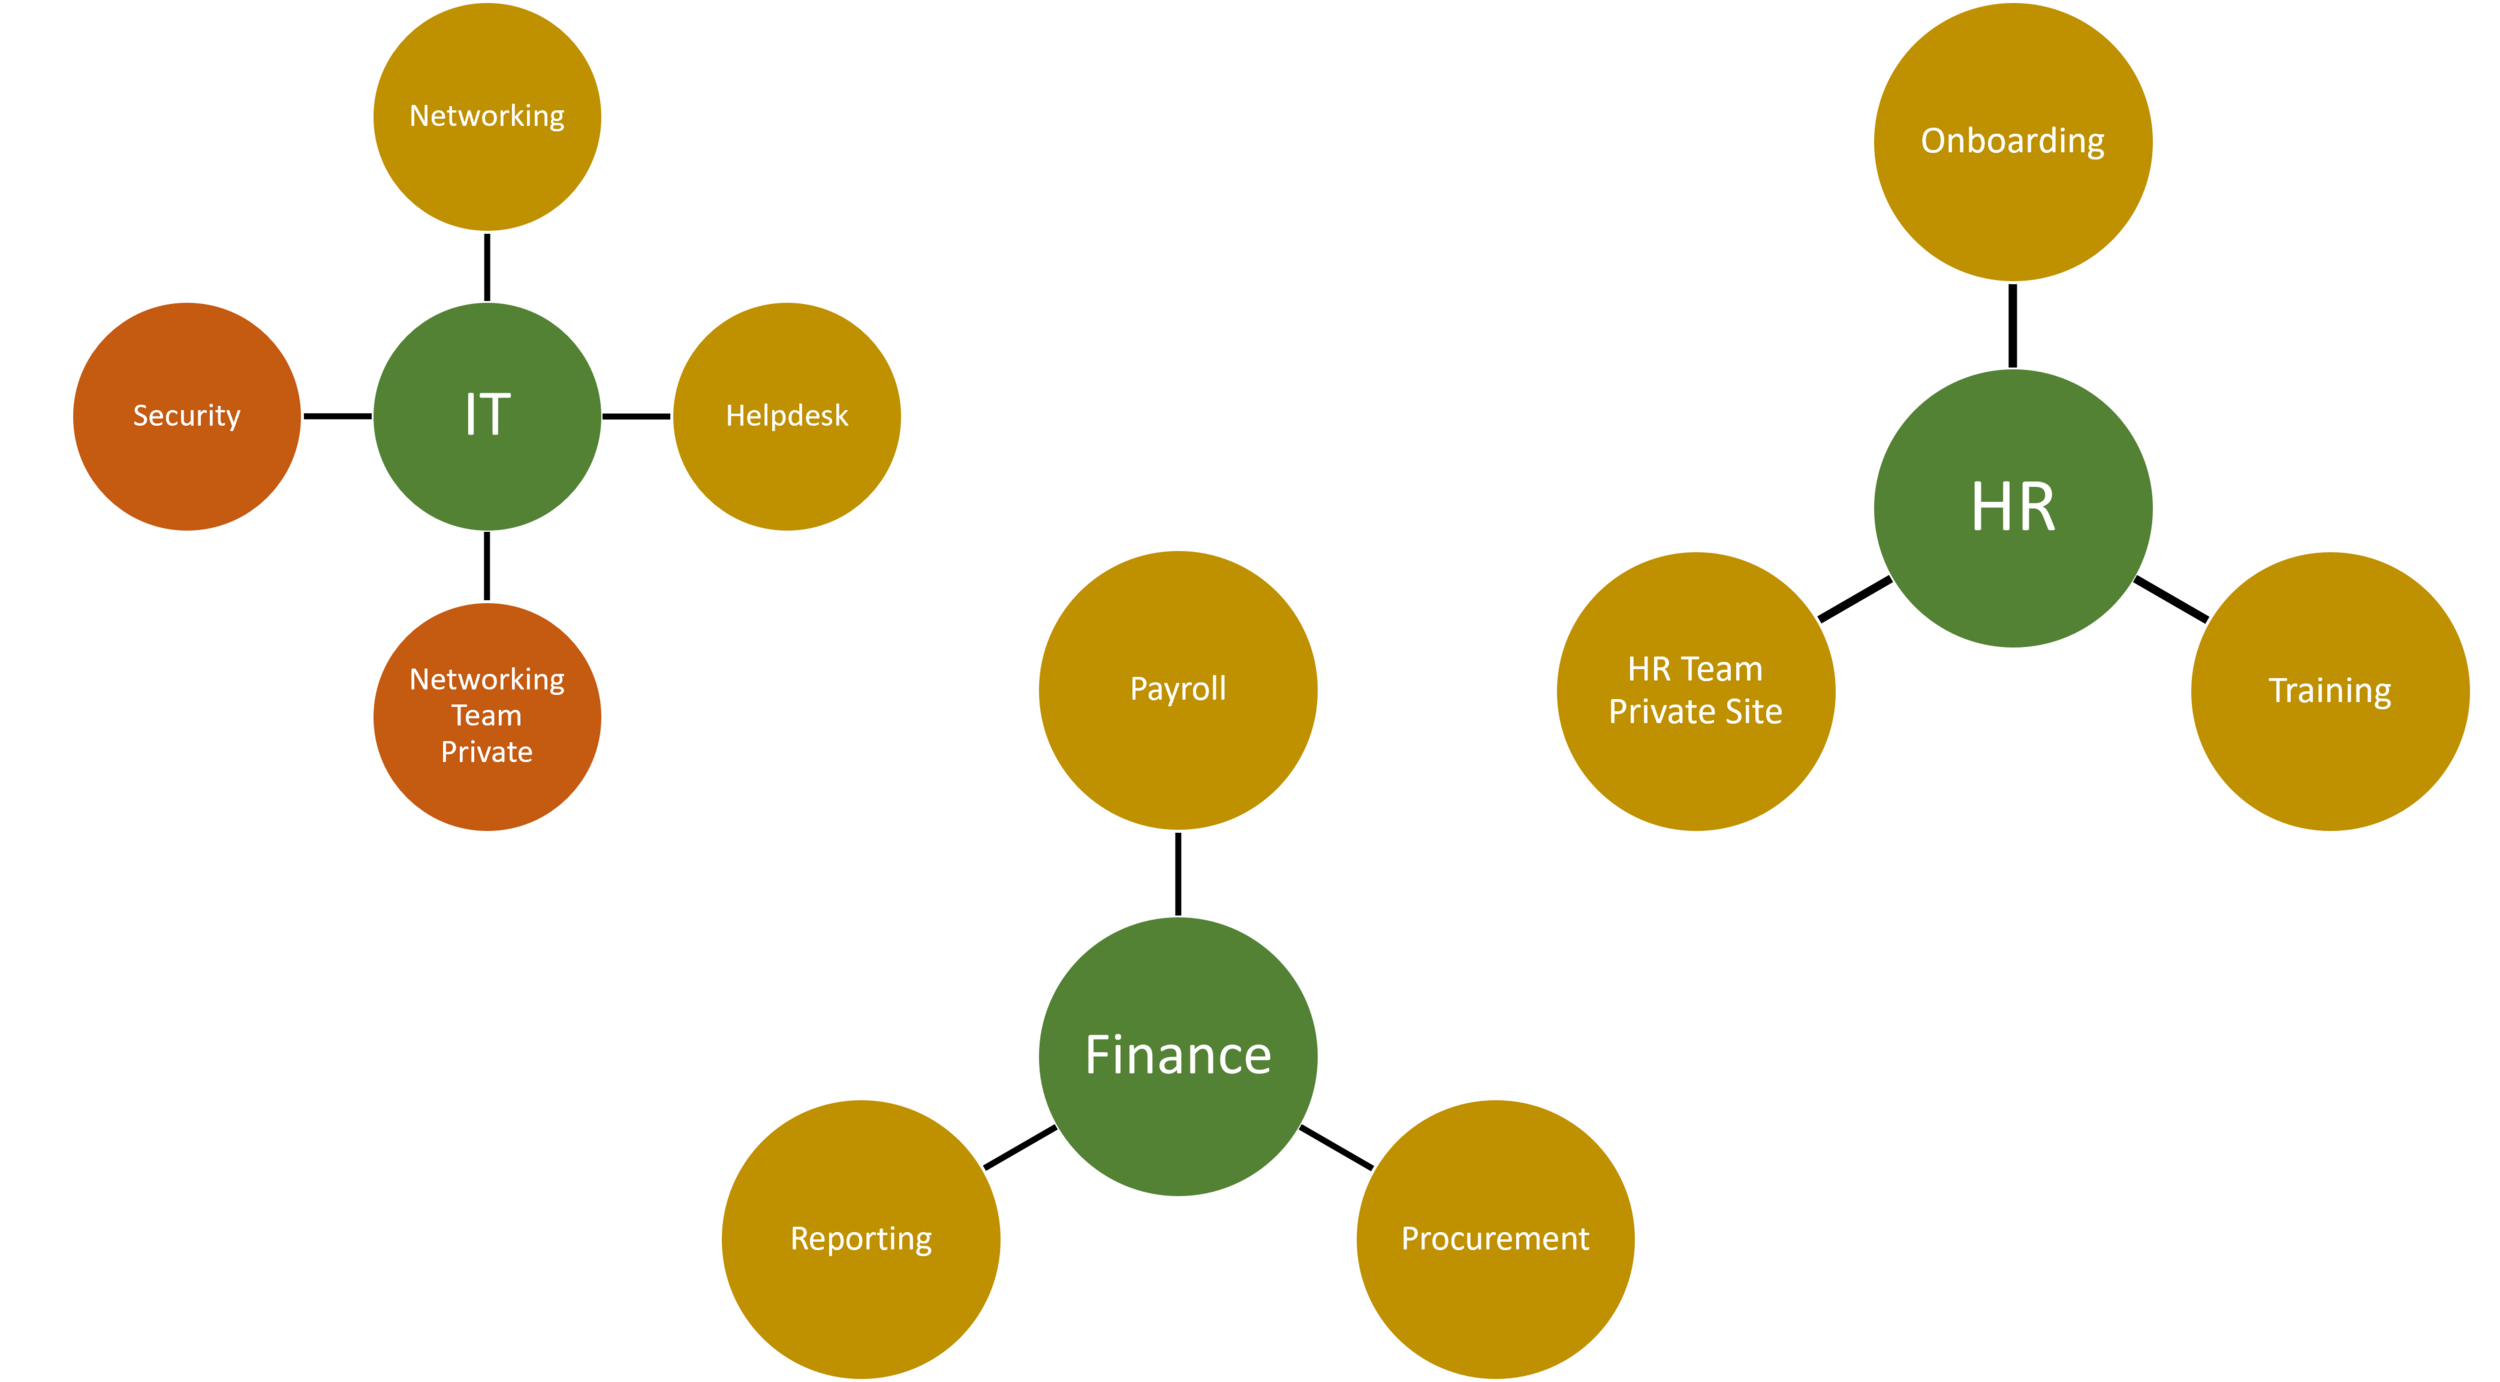
You don't have to have a hub site for every function. However, when a function provides multiple logically different services (as in the examples above), it's good practice to create a hub site to provide a single starting place for your users.
So how do you do it?
Step 1:
Go to the SharePoint Admin Center and click on your active sites. Click the checkbox next to the site you want to register as a hub and click “Register as a Hub Site” from the top menu.
Step 2:
Still within your active sites area in the SharePoint admin center, click the checkbox next to a site and from the top menu select “Associate with a Hub Site”, select your Hub then click “Save”.
Or another way is to go to the site itself, click the settings icon in the top right and select “Site Information”, then under “Hub Association” select the hub you want to link it to.
Step 3:
Once you’ve set up your hub and associated sites, you can go to your hub site and change the logo, branding and global navigation links.
NOTE: Linking a site to a hub doesn’t automatically add it to the navigation, so you will need to add it manually to the Global Navigation bar by clicking “Edit”. Once added, the navigation will show in all associated sites.